Guide: a music player in Rocks (tutorial)
This tutorial builds the window of a small music player in Rocks, connects it to a controller written in xc, gives it a separate layout for phones, and loads it in an app. It takes about fifteen minutes.
You need xcc 0.7 or later and the repository’s apps/rocks. The steps below
use macOS; on Linux and Windows, Ctrl takes the place of ⌘.
1. Write the controller
Section titled “1. Write the controller”Make a folder for the app, Player, and put the controller in it. The
controller is an ordinary class. outlet marks the variables Rocks can connect
to controls, and : action marks the methods controls can call.
#import <Stdio.xc>#import "UXDesignable.xc"#import "UXSlider.xc"#import "UXRsc.xc"
class PlayerController : Object<UXRscAwaking>{    outlet UXButton*    playButton;    outlet UXTextField* titleField;    outlet UXSlider*    volume;
    // called once the window is loaded and every outlet is set    void awakeFromRsc(void) {        Stdio.printf("ready: playing %s\n", titleField.text());    }    void onPlay(UXControl* sender) : action {        Stdio.printf("play %s at volume %d\n", titleField.text(), volume.intValue());    }    void onStop(UXControl* sender) : action    { Stdio.printf("stop\n"); }    void onShuffle(UXControl* sender) : action { Stdio.printf("shuffle\n"); }}
2. Start Rocks and add a form
Section titled “2. Start Rocks and add a form”XCC=/opt/xcc/0.7/bin/xcc sh apps/rocks/run_rocks.shPress New on the toolbar. Rocks adds a form, FORM1, and shows it on the
canvas.
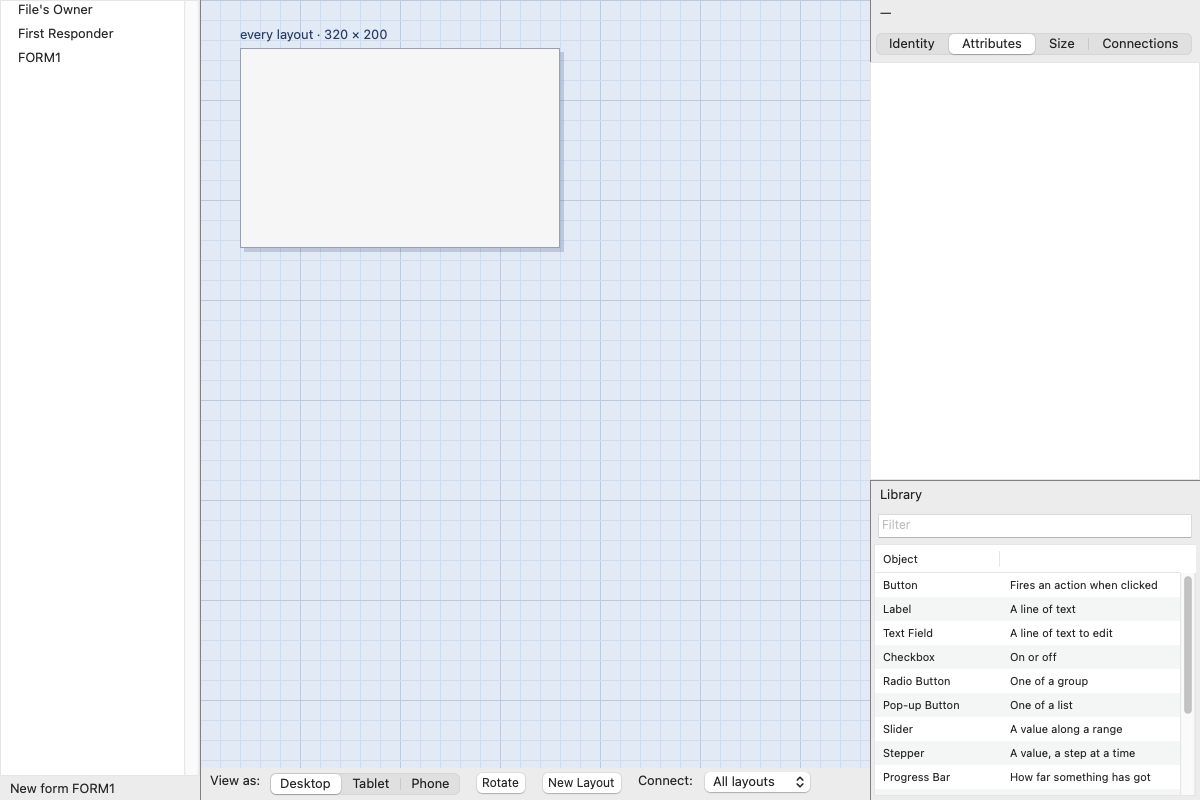
Make it bigger: click the form’s background, open the Size tab, and set W to 480 and H to 300.
3. Lay out the controls
Section titled “3. Lay out the controls”Drag a Button from the library onto the form. While you drag, the button itself shows where it will go.
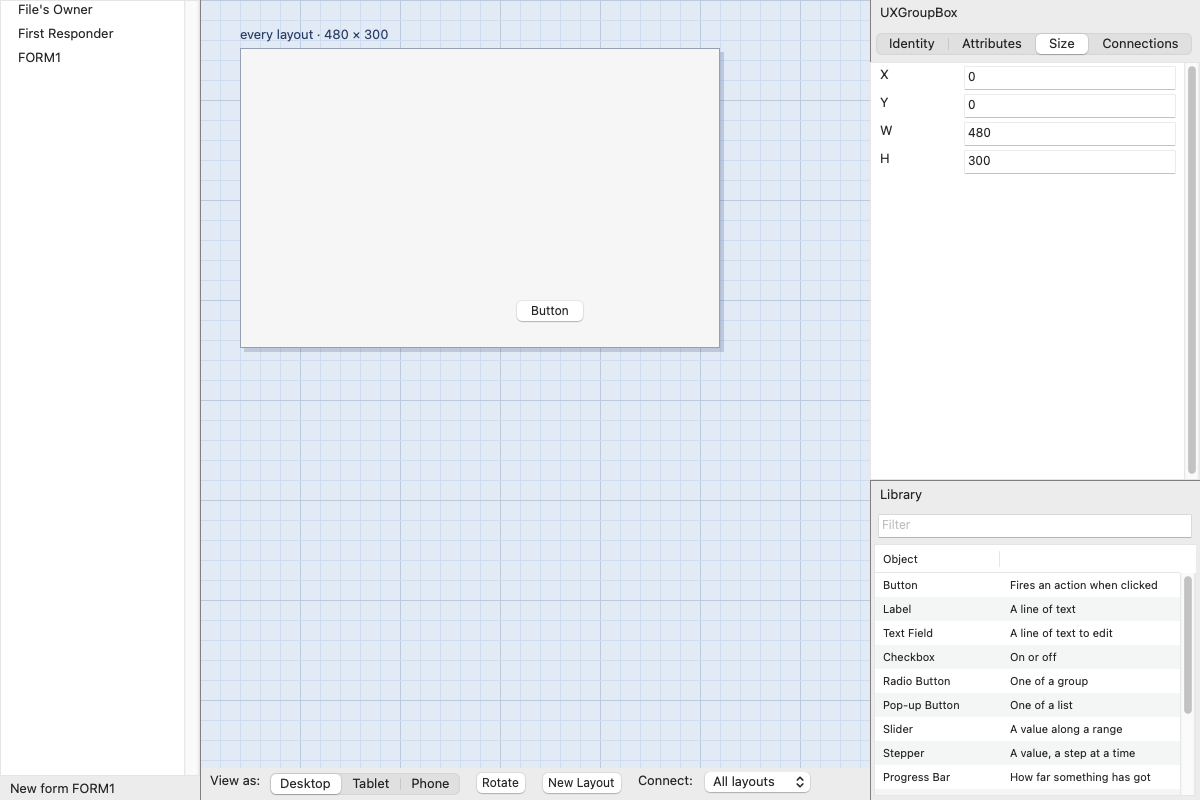
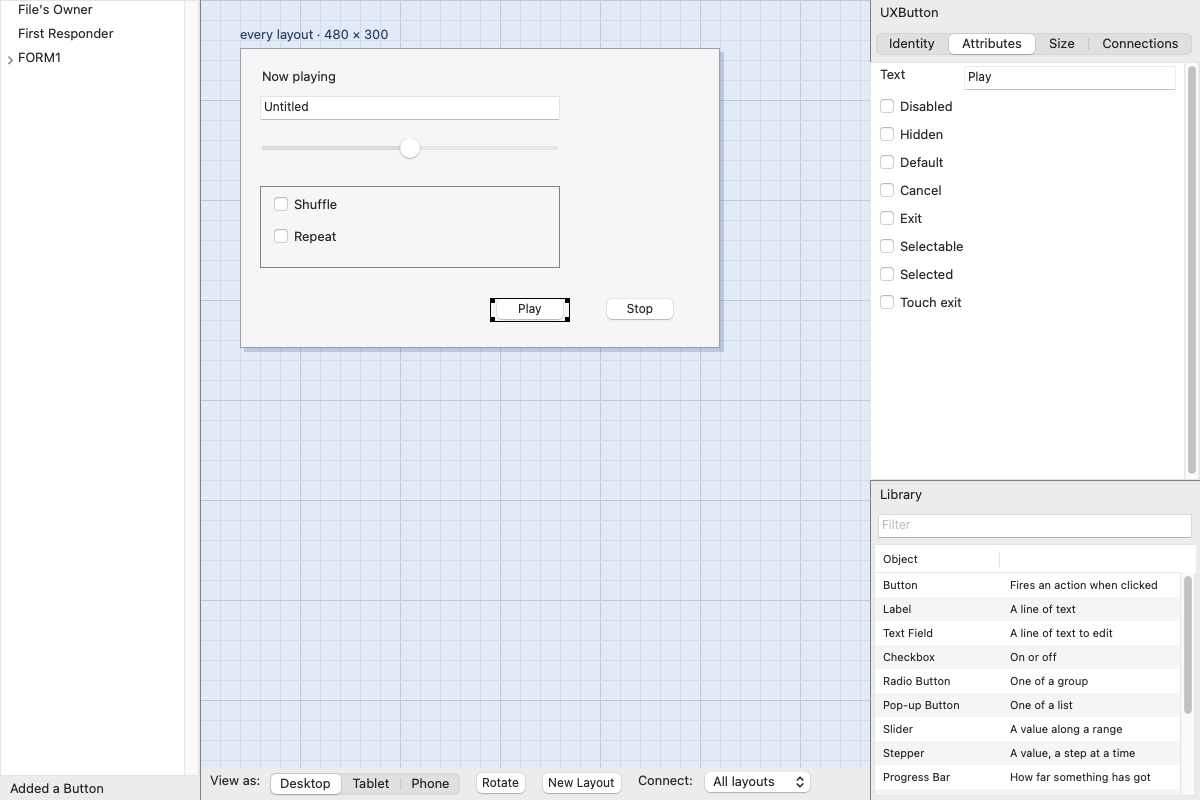
Add the rest the same way, and set each control’s text on the Attributes tab and its name on the Identity tab. Names make the outline easier to read; they do not change how the app behaves.
| Item | Text | Name | Position and size |
|---|---|---|---|
| Label | Now playing | heading | 20, 20 |
| Text Field | Untitled | title | 20, 48, 300 × 24 |
| Slider | volume | 20, 90, 300 × 24 | |
| Box | options | 20, 130, 300 × 90 | |
| Checkbox (in the box) | Shuffle | shuffle | |
| Checkbox (in the box) | Repeat | repeat | |
| Button | Play | play | 250, 250 |
| Button | Stop | stop | 360, 250 |
Drop the two checkboxes inside the box, so they belong to it. Positions are easiest to set on the Size tab; dragging works too.
4. Add the controller
Section titled “4. Add the controller”Save the document into the Player folder as player.rsc (File > Save).
Rocks reads the classes in the folder of the file it has open, so it now knows
PlayerController. If you keep the source somewhere else, use File > Add
Class Source or Library…, or drop the .xc file onto the window.
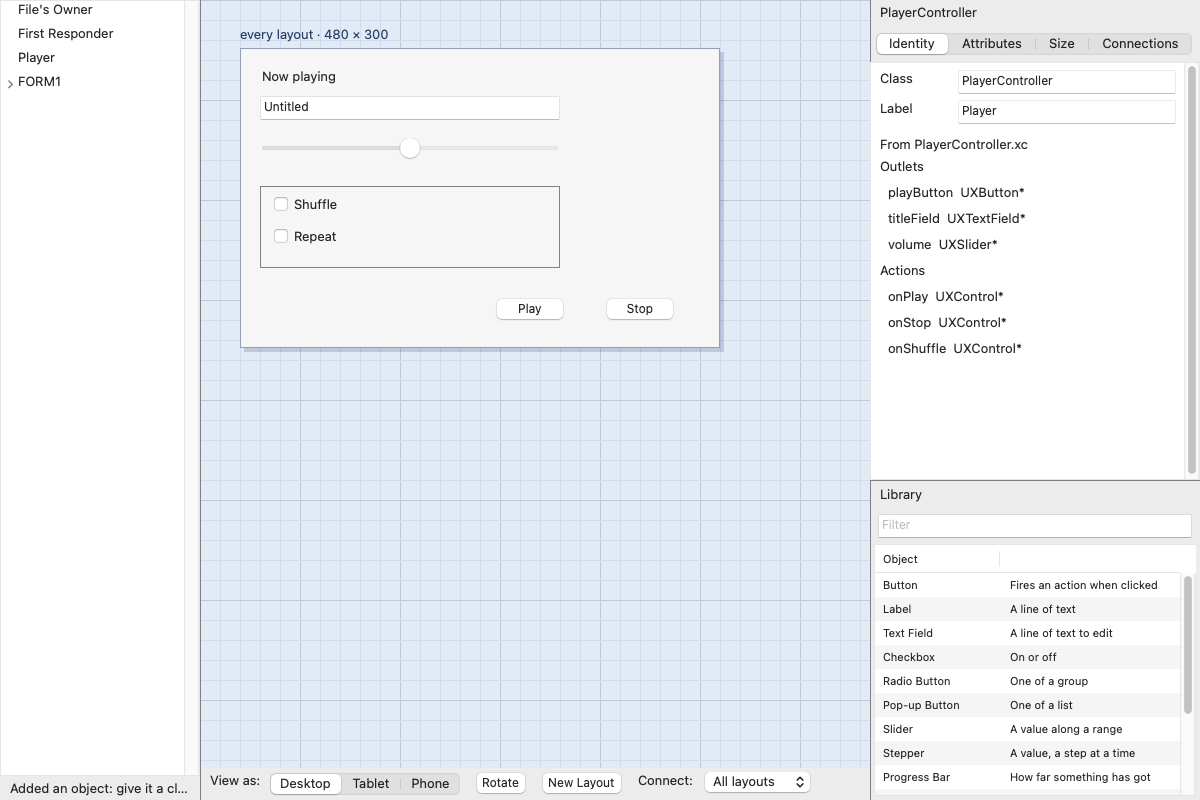
Drag Object from the library onto the form. A new object appears in the
outline. On the Identity tab, set its Class to PlayerController and its Label
to Player. Identity now lists the outlets and actions Rocks read from the
source.
5. Connect it
Section titled “5. Connect it”Right-drag from the Player row in the outline to the title field. A line follows the pointer and frames the control under it.
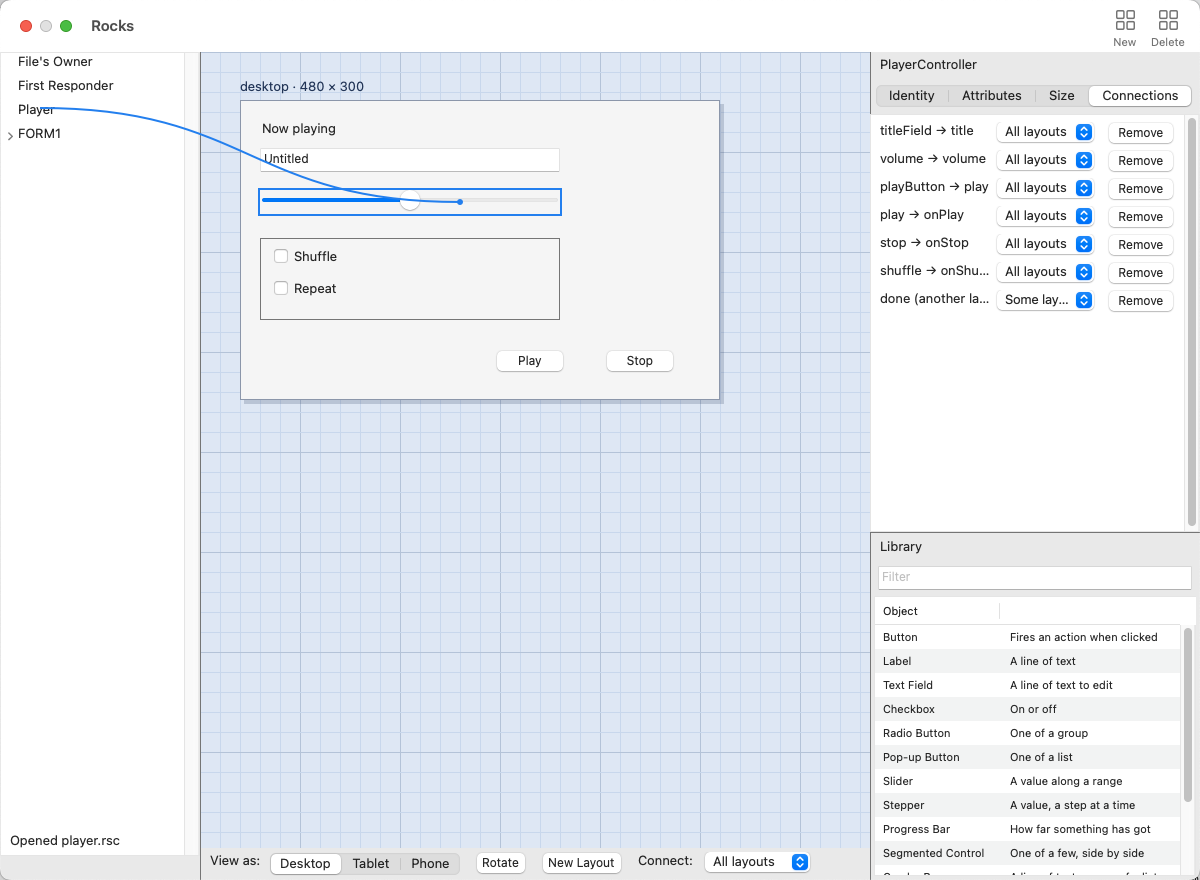
Let go, and Rocks lists what fits. titleField is offered because the
control is a UXTextField; playButton and volume are not.
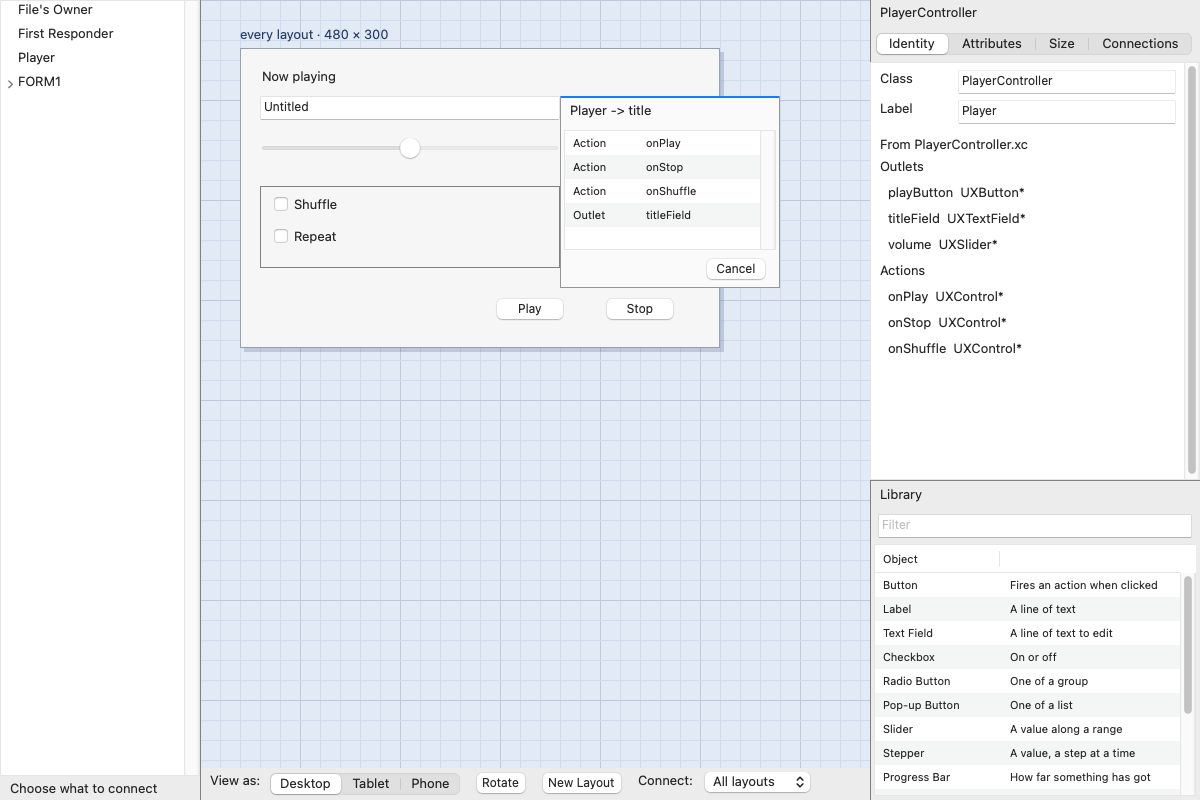
Choose titleField. Then make the rest:
| Drag from | To | Choose |
|---|---|---|
| Player | the slider | volume |
| Player | Play | playButton |
| Play | Player | onPlay |
| Stop | Player | onStop |
| Shuffle | Player | onShuffle |
Select Player and open the Connections tab to check them. Each connection can be removed there.
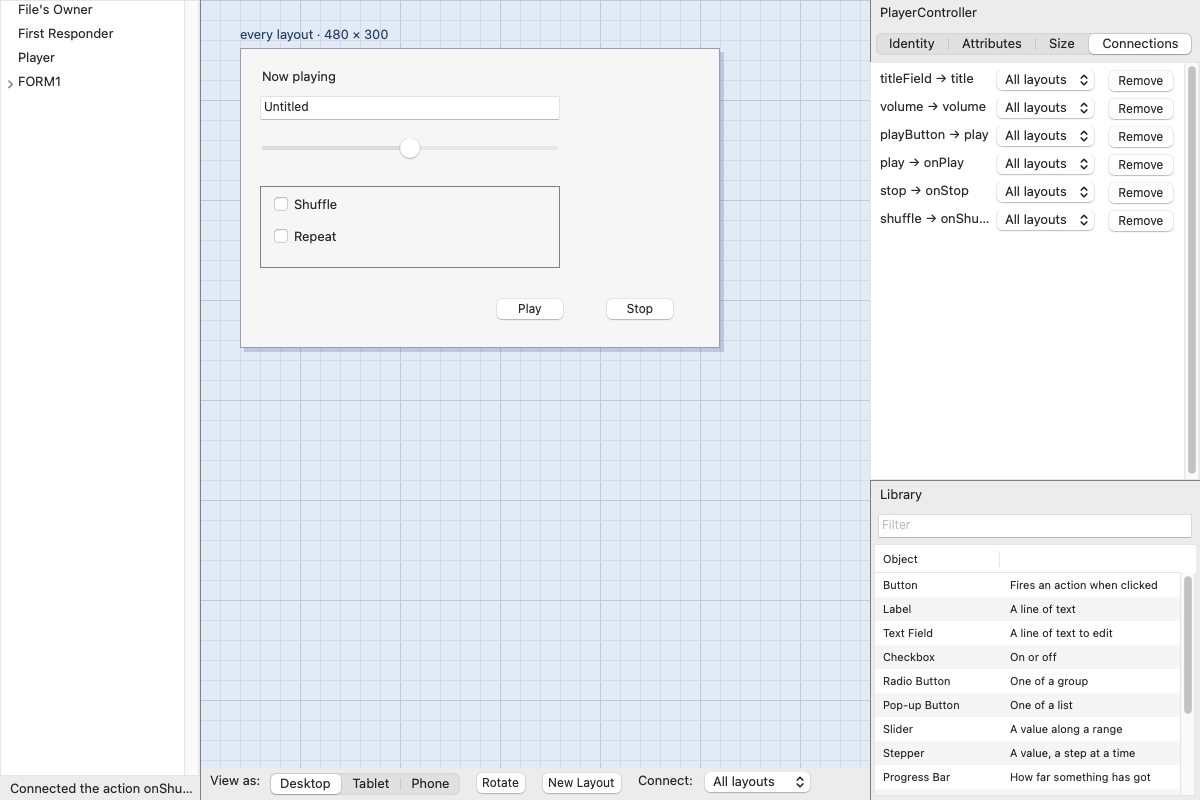
Save.
6. Give the phone its own layout
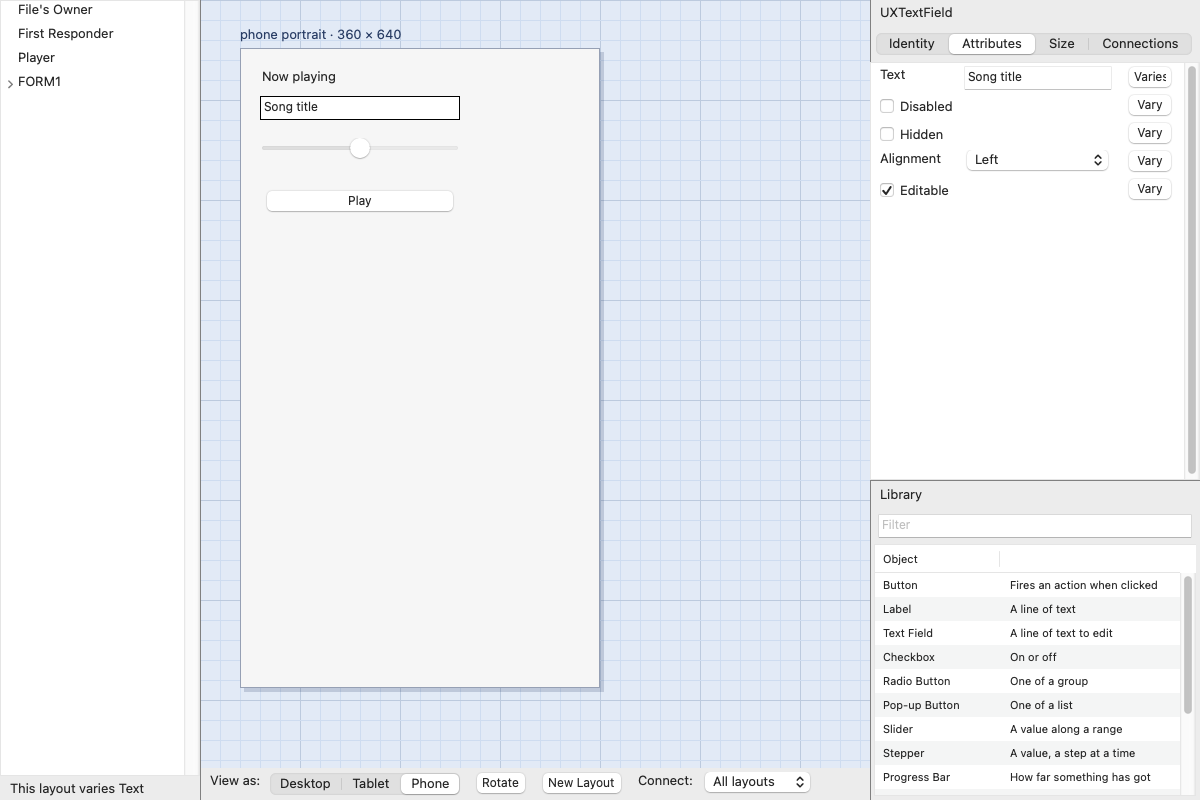
Section titled “6. Give the phone its own layout”On a phone, the player should be one narrow column with no options box and no Stop button, and the title field should invite a song title.
Press Phone under the canvas. The form has no phone layout yet, so the canvas still shows the desktop’s and the status line says so.
Press New Layout. Rocks copies the desktop layout into a 360 × 640 phone layout. Then, in the phone layout:
- Select the options box and press Delete, then do the same for Stop. They go from the phone layout only; the desktop keeps them.
- Make the title field and the slider 200 wide, and move Play to 20, 140 and make it 200 wide.
- Select the title field and open Attributes. Its Text is shared with the
desktop, so changing it here would change both. Press Vary beside Text
first, then set it to
Song title. The button now reads Varies.
The phone gets a Done button that stops playback. It should exist, and be connected, only on the phone:
- Set Connect under the canvas to This layout.
- Drag a Button onto the phone layout at 20, 180, 200 wide, with the text
Doneand the namedone. - Right-drag from Done to the Player row and choose onStop.
The Connections tab shows the connection’s scope as This layout.
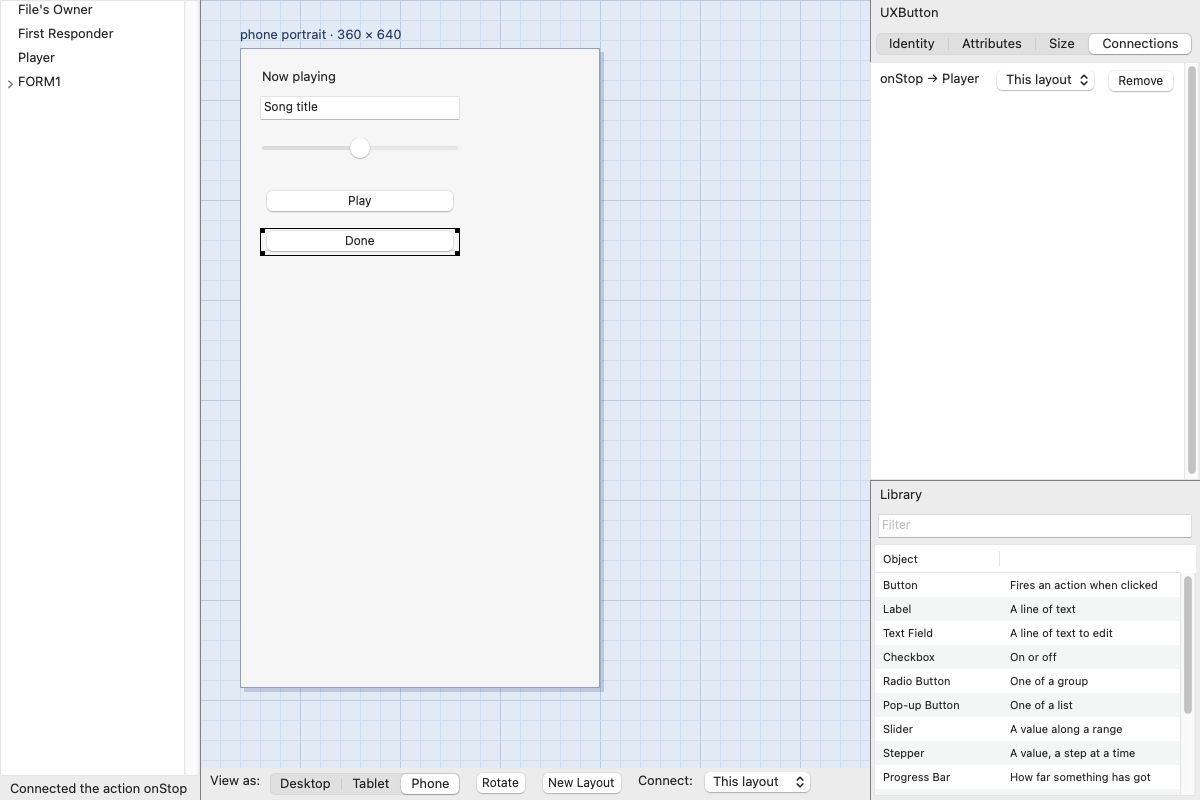
Press Desktop to go back. The Player’s connections now include “done (another layout)”: the phone’s connection, which the desktop does not use. Save.
7. Load it in the app
Section titled “7. Load it in the app”#import <Stdio.xc>#import "UXPlatform.xc"#import "UXApplication.xc"#import "UXWindow.xc"#import "UXFileIO.xc"#import "UXRsc.xc"#import "PlayerController.xc"
class PlayerApp : Object<UXApplicationDelegate>{ UXRscInstance* design; // keeps the controller the file made
i32 applicationDidStart(UXApplication* app) { Data* rsc = UXFileIO.read((u8*)"player.rsc"); if (rsc == (Data*)0) { Stdio.printf("no player.rsc\n"); return 1; } UXView* content = new UXView(); UXWindow* win = new UXWindow(); win.open((u8*)"Player", UXGeom.make(100, 100, 480, 300), content); app.addWindow(win); design = UXRsc.load(rsc.bytes(), rsc.length(), 0, (UXDesignable*)0, content); win.tree.finalise(); win.displayAll(); return 0; }}
void main(void){ UXApplication* app = new UXApplication(); app.setDelegate(new PlayerApp()); app.run();}UXRsc.load does the work:
- It picks the layout for the device: the desktop’s on a Mac, the phone’s on a phone.
- It builds the controls and makes the Player object, a
PlayerController. - It sets the controller’s outlets and connects the actions whose scope includes that layout. On the desktop that is six of the seven: the Done connection belongs to the phone.
- It calls
awakeFromRsc.
The fourth argument is File’s Owner. This app has no use for one, so it passes null; an object you pass there must declare outlets or actions of its own.
Build it the way the other UXKit programs are built (see
your first window), and run it from
the Player folder. It prints ready: playing Untitled, and pressing Play
prints play Untitled at volume 50.
Where next
Section titled “Where next”- Rocks, the interface editor describes every part of the editor.
- Rsc files covers loading in more depth, such as loading a given layout for a preview.
UXRscandUXRscInstanceare the loader’s reference.